
Vcluster is a full-working Kubernetes cluster, installed in a Kubernetes cluster. While the user has access in one namespace or in several namespaces via a Rancher project and has cluster-wide resources remain denied and so no CRDs or mutation webhooks can be installed, should he get full access in the vcluster. Let’s take a look at how far this really works and what limitations there are
Which works immediately:
vcluster create my-vclusterHowever, we want to choose a somewhat secure method that is also multi-tenant. To manage multi-tenant clusters with Rancher has established itself with central user administration. So we need:
In this namespace we can install vcluster. In addition to the installation with the vcluster cli, there is an installation variant with Helm. Here is our values.yaml:
vcluster:
  image: rancher/k3s:v1.23.5-k3s1
securityContext:
  runAsUser: 1000
  runAsNonRoot: true
  allowPrivilegeEscalation: false
  capabilities:
   drop:
   - all
  readOnlyRootFilesystem: true
fsGroup: 1000
The chart’s full scope of configuration can be seen here. It should also be noted that vcluster knows different cluster types: eks, k8s, k0s, k3s. We use k3s.
Now the installation:
helm -n vcl1 upgrade -i cl1 vcluster --values values.yaml --repo https://charts.loft.sh
Verify:
$ vcluster list

 NAME   NAMESPACE   STATUS    CONNECTED   CREATED                         AGE        CONTEXT
 cl1    vcl1        Running               2022-12-01 15:21:35 +0100 CET   28s   frank-test-k8s-12
That’s all.
We can import the vcluster into Rancher using the import function in Rancher. A deploy URL is generated, which we run in the vcluster:
vcluster -n vcl1 connect cl2 -- kubectl apply -f https://k3s.otc.mcsps.de/v3/import/hjjnrlmj9xfsmw7wctsdpr7b6ftc5gkfr9fqv7rlvshzzj86f46q_c-m-84h8jjd7.yaml
Here the first problem appears. In a downstream cluster with different projects and namespaces, I can have different sets of security policies. System services like the rancher agents run in the System project and the cattle-system namespace. There they can spread freely without the restrictions of a project with a user web app.
The vcluster runs in a namespace of the downstream cluster and there with the specified restrictions like PodSecurityPolicy or resource quota. So you have to decide whether this cluster can then run completely in this mode or for example, an unrestricted PodSecurityPolicy is required. From Kubernetes 1.23 you can use the PodSecurityAdmissionController to do this feature set as namespace annotation. So you could be less restrictive on the host system, but then be specific in the vcluster by restrict namespaces via annotation.
We can work around for the rancher agent by deleting the affinity in the deployment and adjusting the securityContext.
spec:
  template:
    spec:
      container:
        securityContext:
          allowPrivilegeEscalation: false
          capabilities:
            drop:
            - ALL
          readOnlyRootFilesystem: true
          runAsNonRoot: true
          runAsUser: 1000
      securityContext:
        fsGroup: 1000
Now we have vcluster in Rancher:
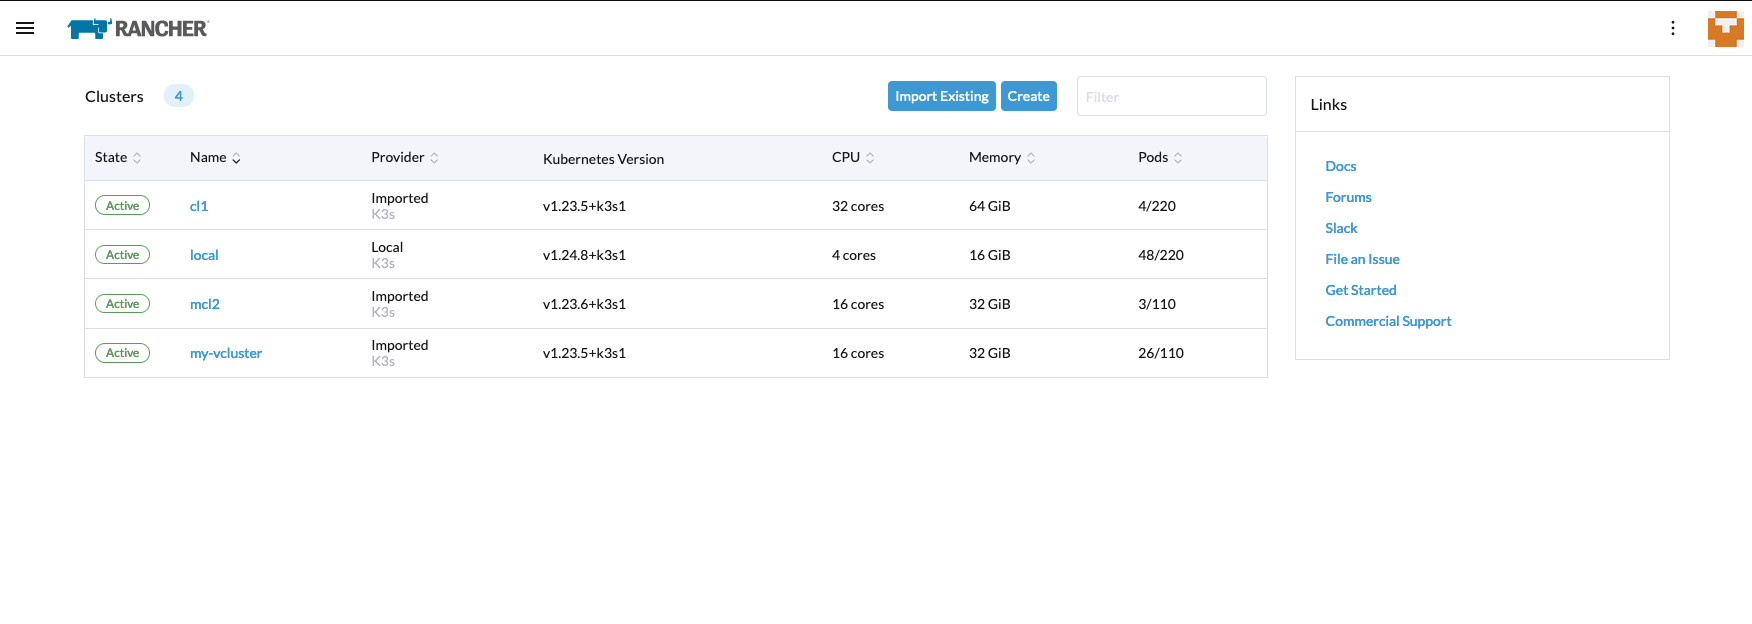
Oops, did we create another vcluster in vcluster now? That is possible. I load the kubeconfig for first
vcluster and in this context I call the helm upgrade -i again, or use vcluster create
Be aware:
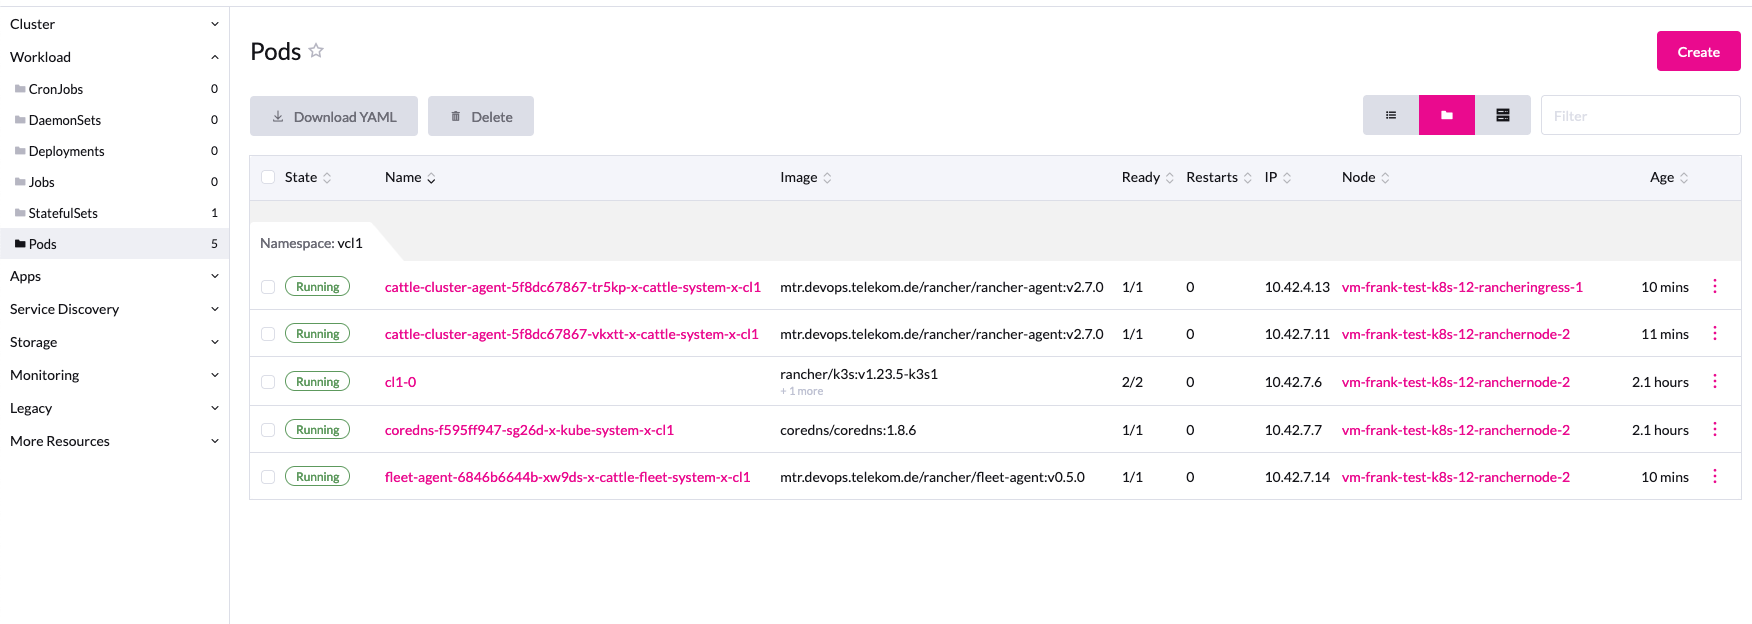
The resources are shown in the upstream cluster with vcluster name and namespace. Since these fields have a limited length of 63 characters, error messages can quickly appear in Kubernetes. That’s why you should always choose short names.
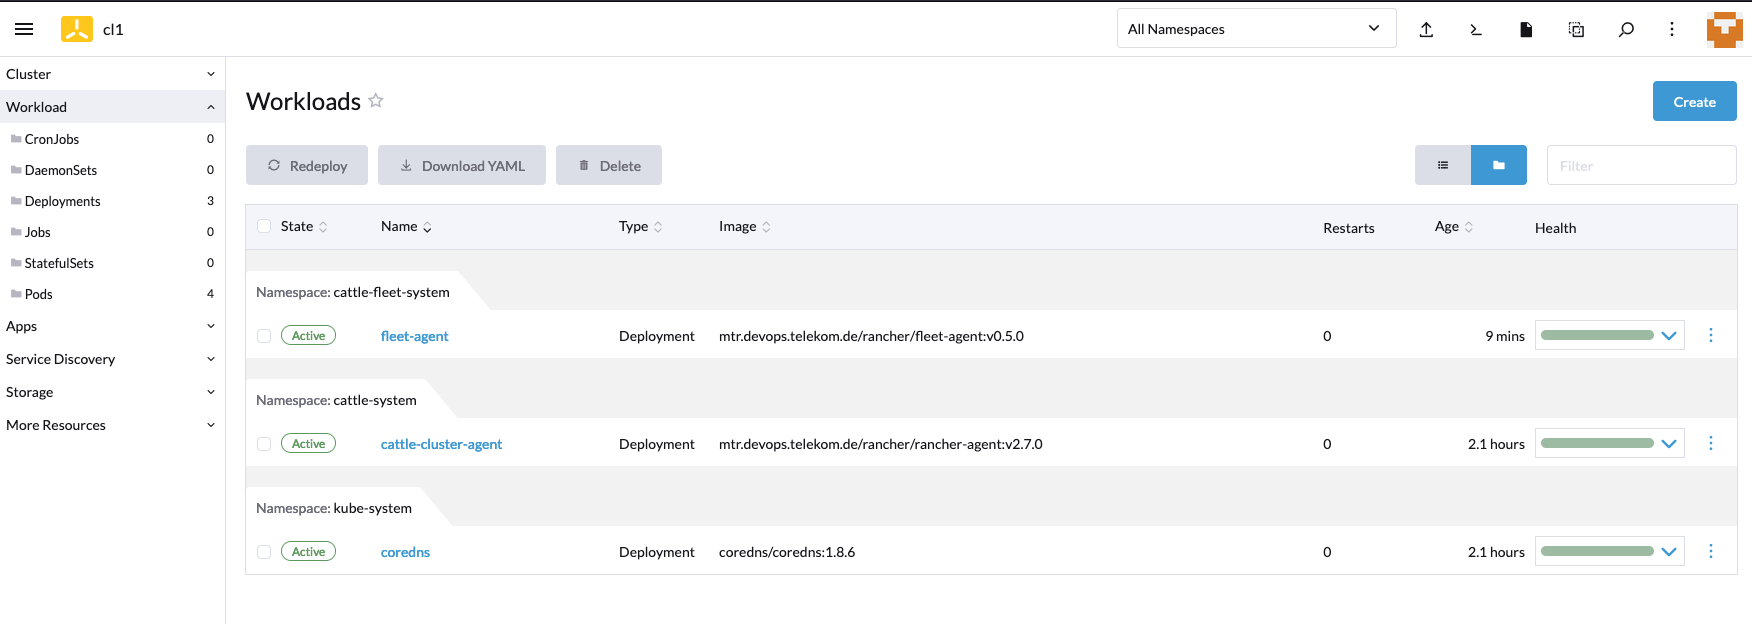
The workload in the vcluster is still very clear, only the rancher and fleet agents are running.
At the latest with the network services, the user notices that he is not in a real cluster.
Of course, network services cannot be installed in virtualization. But with the option
--expose you can get a load balancer service from the downstream cluster and if there about a
Cloud Controller Manager is installed, you also get the public IP in the vcluster.
Here is the installation with vlcuster cli:
$ vcluster -n vcl1 create cl2 -f values.yaml --expose
Verify:
$ kubectl -n vcl1 get services cl2
NAME                                             TYPE           CLUSTER-IP      EXTERNAL-IP    PORT(S)                  AGE
cl2                                              LoadBalancer   10.43.112.229   80.158.88.16   443:30583/TCP            2m19s
Another possibility are mapServices. This option can be specified in values.yaml during installation. Either services are then mapped from the host to the vcluster or vice versa:
Example cert-manager:
mapServices:
  fromHost:
    - from: cert-manager/cert-manager
      to: kube-system/cert-manager
Via Helm Value
isolation:
  enabled: true
you can define a NetworkPolicy for the vcluster, as well as ResurceQuota and LimitRanges. In addition to the default values of the chart, you can of course also overwrite them.
apiVersion: networking.k8s.io/v1
kind: NetworkPolicy
metadata:
  name: release-name-workloads
  namespace: vcl1
spec:
  podSelector:
    matchLabels:
      vcluster.loft.sh/managed-by: release-name
  egress:
    # Allows outgoing connections to the vcluster control plane
    - ports:
        - port: 443
        - port: 8443
      to:
        - podSelector:
            matchLabels:
              release: release-name
    # Allows outgoing connections to DNS server
    - ports:
      - port: 53
        protocol: UDP
      - port: 53
        protocol: TCP
    # Allows outgoing connections to the internet or
    # other vcluster workloads
    - to:
        - podSelector:
            matchLabels:
              vcluster.loft.sh/managed-by: release-name
        - ipBlock:
            cidr: 0.0.0.0/0
            except:
              - 100.64.0.0/10
              - 127.0.0.0/8
              - 10.0.0.0/8
              - 172.16.0.0/12
              - 192.168.0.0/16
  policyTypes:
    - Egress
---
# Source: vcluster/templates/networkpolicy.yaml
apiVersion: networking.k8s.io/v1
kind: NetworkPolicy
metadata:
  name: release-name-control-plane
  namespace: vcl1
spec:
  podSelector:
    matchLabels:
      release: release-name
  egress:
    # Allows outgoing connections to all pods with
    # port 443, 8443 or 6443. This is needed for host Kubernetes
    # access
    - ports:
        - port: 443
        - port: 8443
        - port: 6443
    # Allows outgoing connections to all vcluster workloads
    # or kube system dns server
    - to:
        - podSelector: {}
        - namespaceSelector:
            matchLabels:
              kubernetes.io/metadata.name: 'kube-system'
          podSelector:
            matchLabels:
              k8s-app: kube-dns
  policyTypes:
    - Egress
---
# Source: vcluster/templates/resourcequota.yaml
apiVersion: v1
kind: ResourceQuota
metadata:
  name:  release-name-quota
  namespace: vcl1
spec:
  hard:
    count/configmaps: "100"
    count/endpoints: "40"
    count/persistentvolumeclaims: "20"
    count/pods: "20"
    count/secrets: "100"
    count/services: "20"
    limits.cpu: "20"
    limits.ephemeral-storage: "160Gi"
    limits.memory: "40Gi"
    requests.cpu: "10"
    requests.ephemeral-storage: "60Gi"
    requests.memory: "20Gi"
    requests.storage: "100Gi"
    services.loadbalancers: "1"
    services.nodeports: "0"
---
# Source: vcluster/templates/limitrange.yaml
apiVersion: v1
kind: LimitRange
metadata:
  name: release-name-limit-range
  namespace: vcl1
spec:
  limits:
  - default:
      cpu: "1"
      ephemeral-storage: "8Gi"
      memory: "512Mi"
    defaultRequest:
      cpu: "100m"
      ephemeral-storage: "3Gi"
      memory: "128Mi"
    type: Container
If you don’t want to use K3s for whatever reason, you can also install vcluster with plain K8S.
All components such as API, controller, scheduler and etcd are installed separately. Unfortunately, this only works with unrestricted
PodSecurityPolicy, or you soften the restricted one with CAP_NET_BIND_SERVICE.
Here is a values.yaml
securityContext:
  runAsUser: 1000
  runAsNonRoot: true
  allowPrivilegeEscalation: false
  capabilities:
   drop:
   - all
  readOnlyRootFilesystem: true
fsGroup: 1000

etcd:
  securityContext:
    runAsUser: 1000
    runAsNonRoot: true
    allowPrivilegeEscalation: false
    capabilities:
     drop:
     - all
    readOnlyRootFilesystem: true
  fsGroup: 1000
controller:
  securityContext:
    runAsUser: 1000
    runAsNonRoot: true
    allowPrivilegeEscalation: false
    capabilities:
     drop:
     - all
    readOnlyRootFilesystem: true
  fsGroup: 1000
scheduler:
  securityContext:
    runAsUser: 1000
    runAsNonRoot: true
    allowPrivilegeEscalation: false
    capabilities:
     drop:
     - all
    readOnlyRootFilesystem: true
  fsGroup: 1000
api:
  securityContext:
    runAsUser: 1000
    runAsNonRoot: true
    allowPrivilegeEscalation: false
    capabilities:
      add:
      - CAP_NET_BIND_SERVICE
    readOnlyRootFilesystem: true
  fsGroup: 1000
job:
  securityContext:
    runAsUser: 1000
    runAsNonRoot: true
    allowPrivilegeEscalation: false
    capabilities:
     drop:
     - all
    readOnlyRootFilesystem: true
  fsGroup: 1000
scheduler:
  securityContext:
    runAsUser: 1000
    runAsNonRoot: true
    allowPrivilegeEscalation: false
    capabilities:
     drop:
     - all
    readOnlyRootFilesystem: true
  fsGroup: 1000
syncer:
  securityContext:
    runAsUser: 1000
    runAsNonRoot: true
    allowPrivilegeEscalation: false
    capabilities:
     drop:
     - all
    readOnlyRootFilesystem: true
  fsGroup: 1000
And the installation:
$ vcluster -n vcl1 create cl4 -f values.yaml --distro k8s
Verify:
$ vcluster list

 NAME   NAMESPACE   STATUS    CONNECTED   CREATED                         AGE       CONTEXT
 cl4    vcl1        Running               2022-12-01 23:25:21 +0100 CET   3m24s     frank-test-k8s-12
Possibly there are complains regarding seccomp which needs an annotation in PSP:
annotations:
  seccomp.security.alpha.kubernetes.io/allowedProfileNames: '*'
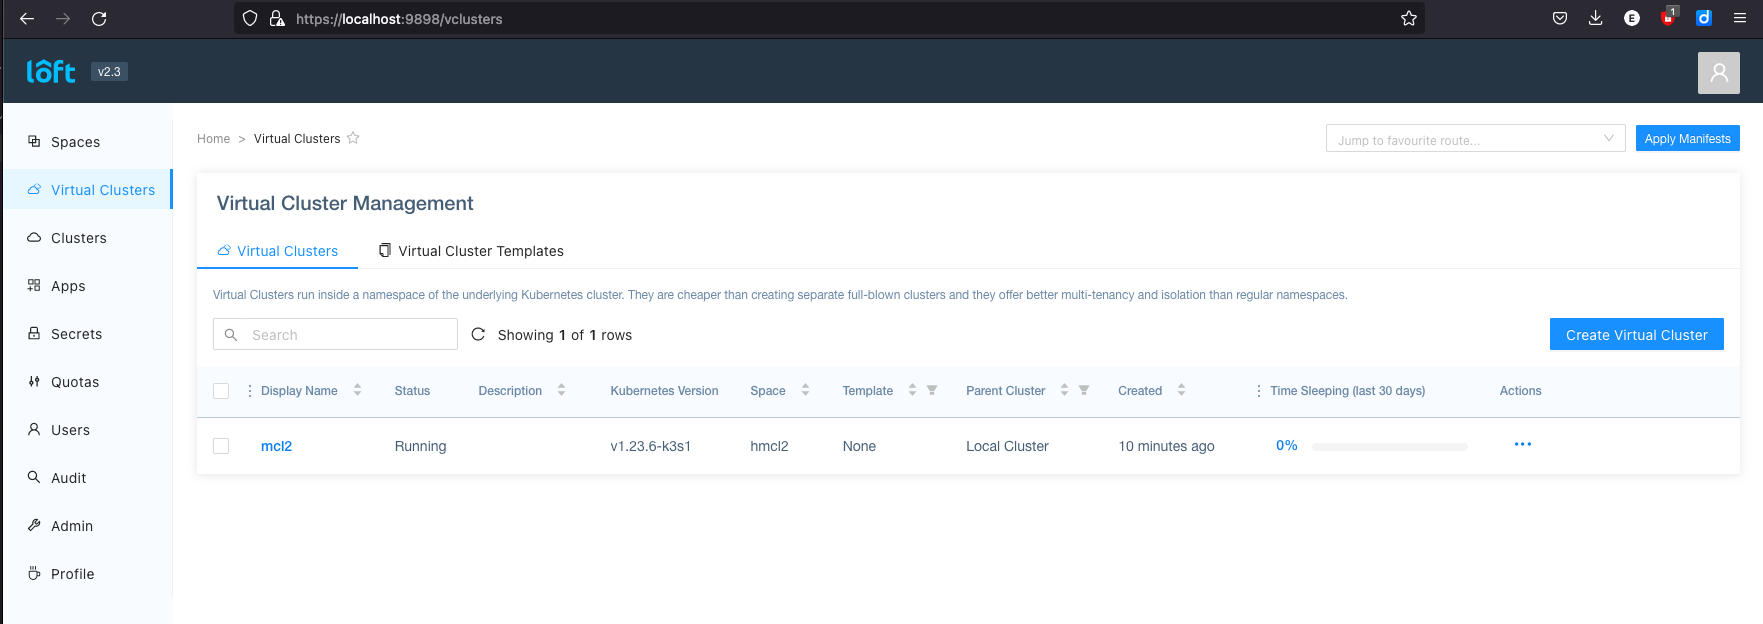
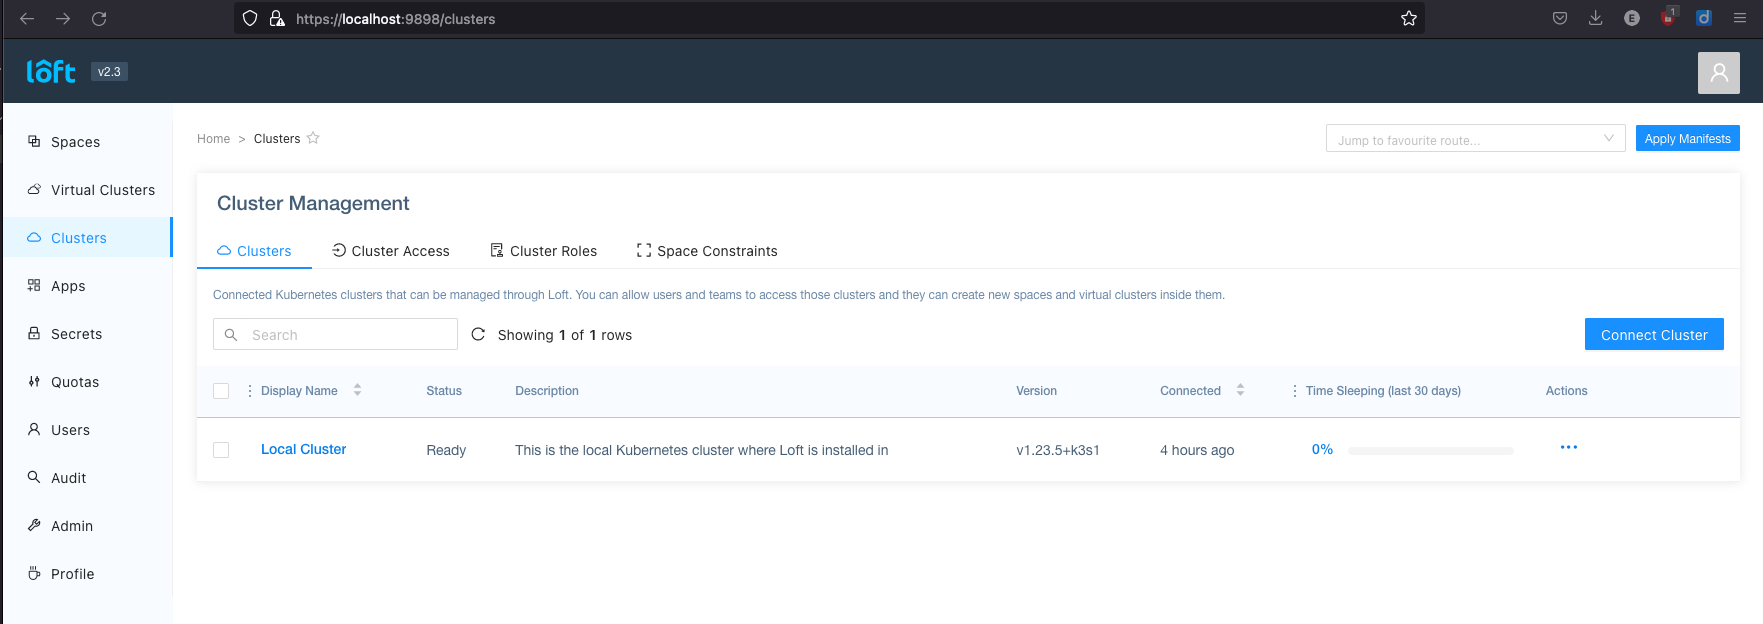
Loft is the company behind vcluster. And at the same time a platform where I can manage my vclusters. For this you have to install the loft-agent and the loft cli. More information on the website loft.sh.
With loft start you start the registration process with the Loft service. The agent forwards all requests and shows
us this administration website:
Vcluster is another form of virtualization in the cloud landscape regarding the limitations of Kubernetes cluster-wide resources into project-specific namespaces. So the target group are users who have full cluster access need to install Admission Controller, Operator and other applications with API extensions (CRDs) and also want to operate this tools. The normal web developer is provided with a Kubernetes namespace in which to deploy their web application. be satisfied and request all other services from a managed service.